
When it comes to Christmas decorating, everyone has their own unique, sometimes very specific, process. That process has allowed them to experience season after season of festive enjoyment, wonder and joy. But what about the Christmas tree itself? For many, the Christmas tree is meant to be the centerpiece and the most important decoration of their holiday home, but sometimes the fulfillment of that aspiration might need a little extra inspiration. That’s where we come in.
Decorating the Christmas tree is not only an art, but it’s also a science. While there are plenty of chances to utilize your personal and creative flair along the way, there is also a fool-proof method to help guide your creativity. And that’s what we would love to share with you today. Best of all, our Christmas tree decorating method is fun, easy, and can be successfully accomplished with just a few steps. It even works whether you have an artificial tree or a live tree.
Once your tree is standing, supported securely with a sturdy base, and positioned in the location you desire, simply follow the 5 simple steps below. Ready to get started?
- Fluff Your Tree
The beauty of a dense, fully-extended Christmas tree, decorated from top to bottom, and twinkling with hundreds of lights is quite a sight to behold. But how does one achieve this attractive level of presentation? The key comes from this first step: fluffing. Now, this won’t actually make your tree fluffy. In fact, it might be a good idea to use gloves during this step because Christmas trees are actually quite prickly. But fluffing will give your tree a fullness, depth, and density that is essential prior to move on to the actual decorating portion.
Start at the bottom of your tree. Take each branch, from its base, and with each auxiliary limb, fan the individual tips outward. It’s almost like you are trying to make a hand shape from each section. While fanning the limb tips away from the tree, try to adjust the branches vertically upward if possible. Follow along the circumference of your tree, doing the same for each branch and moving upward until you get to the very top. Once you are high enough up the tree, a ladder could come in handy. When done, make sure there is a piece of branch extended vertically from the tip of the tree. That will help a lot once you get to the final step.
When the fluffing process is done, take a step back and look at your tree from afar. This makes it easier to see where you might need further adjustments to the tree’s branches and limbs to make it as aesthetically pleasing as possible, preparing you for Step 2. - Add Your Lights
For many, Christmas lights are what truly give a tree its magical quality. In fact, some even like to string their lights unlit. That way, there is a big reveal once the tree has been fully decorated and the lights are finally plugged in. This is, of course, a matter of preference. Our method for stringing lights works just as well with lit lights as it does with unlit ones.
A few things to consider before you begin:
Do you have enough lights for your tree?
and
Do all of your light strands work?
This will save you some frustration later on.
String your lights, one strand at a time, starting at the top of the tree Use the end without the plug and wind your way down in a vertical line, securing the strand on the limbs. You will want to make sure the outer tips of the branches are lit, but you will also want to wind your lights inward too, towards the center of the tree, as you work your way down. Once you have finished your first strand, your end plug should be positioned near the bottom of the tree, closer to the trunk. Simply repeat the same process with your next strand.
Stringing lights vertically, instead of horizontally, helps eliminate plug and outlet confusion once you are ready to connect everything. But it also ensures that the time you invested in fluffing yields the best results, to create a fullness of illumination and all-over brightness. - Add Your Tinsel, Ribbon, or Garland
This step can be optional, but we find that the addition of tinsel, ribbon, or garland to a Christmas tree provides a warmness, richness, and depth of quality that will enhance a Christmas tree’s overall appeal.
One of the keys to stringing strands of tinsel is to stick to the outer circumference of the Christmas tree branches. This is where the strands will provide the best complement to your tree. Remember that this decorative touch is an accent, so it should be treated as one. You want the strands of garland to be noticed but their effect should be subtle. It’s also good to leave about six inches of space between each of your tinsel decorated branches. This is a good measurement for controlling tinsel density. - Add Your Ornaments
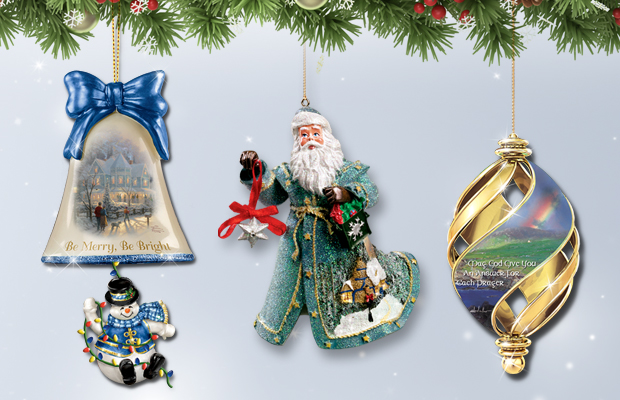
We all have our favorite Christmas ornaments. Some have been in our families for generations. Some have been collected over the years and reflect our personal style. Some, perhaps, are beautiful, homemade creations, constructed by our children with lots of love. Most people have boxes and boxes and boxes of unique ornaments, from the most basic colored bulbs to ornate, heirloom-quality masterpieces, and this is the step where they all get unboxed to bask in the glory of the holiday season.
The thing to remember with this step is: have fun. Whether you are the master ornament hanger going it alone, or this is a family affair, there is no right or wrong way to hang the ornaments. Just enjoy the process and do what comes naturally. If you find that you want to highlight certain ornaments, particularly if they have sentimental value to your family, just be sure to position the ornaments near a light. That way it gets the festive spotlight it deserves. - Add Your Topper and Tree Skirt
Now that your tree is decorated from top to bottom, it’s time to add the “top” and “bottom.” If you have an angel, star, or another special tree topper, you can now crown your Christmas tree with its perfect finishing touch. Make sure your ladder is secure before making the climb to the top.
And don’t forget about the tree skirt! Wrapping the base of your Christmas tree with a skirt not only provides a festive camouflage for the tree stand but it also creates a wonderful canvas of presentation for arranging gifts, setting up Nativity sets, putting together an electric train to encircle your tree, and many other decorative touches. Plus, they come in as many styles and colors as you can imagine.
Have you had a chance to sit back with a cup of hot cocoa and admire your holiday masterpiece yet? We hope so. We also hope these 5 easy steps have helped you navigate the Christmas tree decorating process and provided a jolly ol’ dash of inspiration. Now all that is left to do is enjoy the wonder of the season and the heartwarming peace, love, and joy that come along with it. Merry Christmas!
5 Easy Steps: Decorate Your Christmas Tree Like a Pro by The Bradford ExchangeAbout The Bradford Exchange
The Gift Advisors @The Bradford Exchange are thrilled to help you discover a wealth of artistic treasures, all of which began with passion. Whether you are looking for that perfect personalized gift or a unique collection for yourself, we are driven to make your shopping experience as joyful as possible and hope you are surprised and delighted with what you find. Thank you for your continued support.